
Groups and users don’t get automatic access rights to newly created document types by the system. This is why an initial assignment of rights by the supervisor is mandatory to enable users and groups to work with the document type.
Document types are the organizational backbone of a PROXESS archive database. Each archived document must be assigned to a document type. Document types are created and configured in the “PROXESS Administrator” program.
Requirements for the rights assignment:
For a user in PROXESS to see documents of a certain document type and work with them, it is necessary for this user to have an access right for this document type.
|
|
Groups and users don’t get automatic access rights to newly created document types by the system. This is why an initial assignment of rights by the supervisor is mandatory to enable users and groups to work with the document type. |
Step by step:
To manage document type rights, mark the entry for your PROXESS system in the console root and select the action Connect. Log in as supervisor with smartcard and PIN.
Double-click the branch to view all databases of the connected PROXESS system. Connect to the desired database by marking the desired database and selecting the Connect command in the “Actions” menu.
Tip
|
|
The currently active, connected database is displayed in brackets in the left pane in the databases branch for your information. |
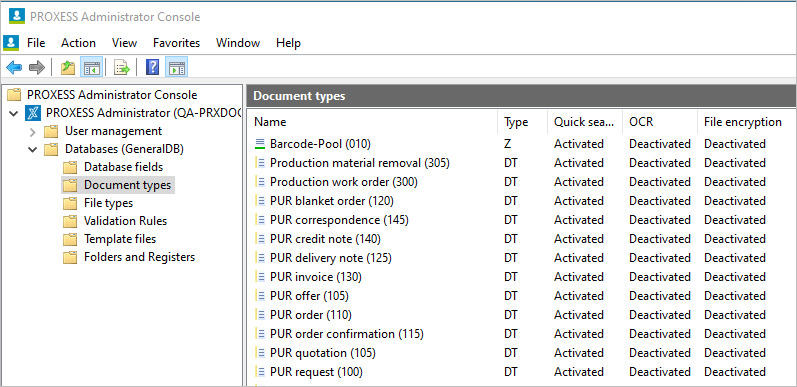
Fig.: Connected to the “Dynamics” database
The document types and existing document type rights available in this database are “loaded” only after a database has been successfully connected and can now be managed.
First option: Grant document type rights via the document type
Select the “Document types” folder.
Double-clicking the desired document type opens the following dialog:
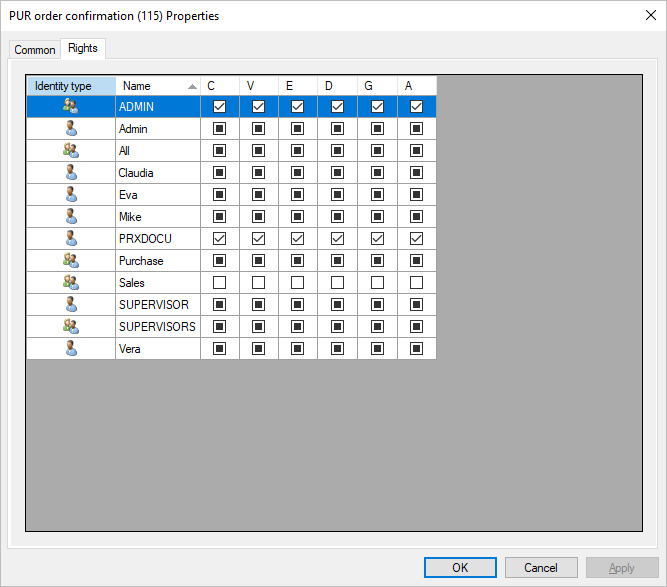
Fig.: Overview of all rights for the doc type “Credit-Deb”
There are six different action rights on the document type level:
|
Create (E) |
If the checkbox is activated, the user gets the right to create new documents of this type. |
|
View (A) |
If the checkbox is activated, the user/the group has the right to view documents of this type. This is the prerequisite for determining whether documents of this type can be retrieved in a search and displayed in the list of results. |
|
Edit (B) |
If the checkbox is activated, users have the right to edit documents of this type. They can thus change properties fields as well as all files for this document. |
|
Delete (L) |
If the checkbox is activated, the user has the right to delete documents of this type. Deletion is only a corrective measure and should not be the rule for archiving. The right to delete should therefore be used very sparingly. Important note: PROXESS users are not able to restore deleted documents. |
|
Grant individual document rights (Z) |
If the checkbox is activated, users have the right to themselves grant rights for individual documents of this type. This is advantageous for editing processes that pass through the hands of multiple users. A department manager who e.g., wants to grant a case worker insight into a confidential memo can do this without generally having to authorize this user for the document type memo. Or the other way around: If the confidential document should only be accessible to a very small group of people, the grant user can deny other people authorized for this document type access to this particular document. This means that users with this right can expand or limit the rights structure you create so that an overview of the effectively applicable rights to a document is only possible in the document window of PROXESS. |
|
Grant document type rights (V) |
If the checkbox is activated, the user is allowed to grant the action rights New, View, etc., to other users for this document type. Only supervisors and database area administrators can grant this right. This option makes sense if the company has only set up a database archive and thus can’t perform a legal differentiation on the database level. This is generally the case for smaller PROXESS systems. |
The action rights build on each other. You can e.g., assign only the right to view to users. If you want to assign the right to delete, this requires the right to view and must also be assigned.
Rights statuses:
|
|
The right has been granted. |
|
(or grayed-out check box in the classic Windows design) |
Right not granted (default setting).
However, a user may have corresponding rights through group membership. |
|
|
The right is explicitly revoked (forbidden).
“Forbidding” a right for an individual user overrides the right that the user would have due to group membership. |
Click the check box to change the respective rights status.
Second option: Change document type rights via the group/the users:
Select the “User management” node.
Mark the Groups branch. (Alternatively you can also grant the rights on a user level. In this case, mark the User branch.)
In the middle pane, select the desired group whose rights you want to manage and select the Properties command in the “Actions” menu. Select the Rights tab.
Fig.: Dialog box to manage rights for the group “Human resources” in the “Personnel” database
Now proceed as described under the “First option: Grant document type rights via the document type”.
|
|
If you want to grant the same rights for multiple document types/multiple users or groups, you can simplify your work. Mark the respective document types or groups or users and select the command Grant multiple rights in the context menu. Grant the desired rights as usual and confirm your entries with Apply. |
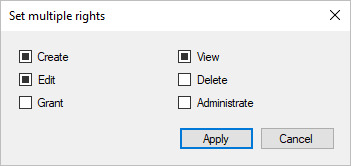
Fig.: Simultaneous editing of the rights for multiple document types/multiple users or groups


